-
How We Play Basketball on a Sloped Driveway
Creating a small platform for a basketball hoop is a fun and practical project that can be done with ease using 12 by 12 pavers. If you’re looking for a durable and long-lasting solution for your basketball hoop, this is a great option to consider.
Recently, I decided to build a small platform for my basketball hoop using 12 by 12 pavers. The process was simple and straightforward, and I was able to complete the project in just a few hours.
Here’s how I did it:
- Dig a square hole: I started by digging a square hole that was 5 inches deep. I used a level to make sure the hole was even and straight.
- Add the paver base: Next, I added a layer of paver base to the bottom of the hole. I used a rake to spread the base evenly and then used a tamper to compact it down.
- Add leveling sand: To ensure that the pavers would sit level, I added a layer of leveling sand on top of the paver base. I used a level to check for any high or low spots and added or removed sand as needed.
- Place the pavers: Once the base was prepared, I started laying the pavers. I made sure to check each paver with a level as I went to ensure that they were all even.
- Install the basketball hoop: Once the pavers were in place, I installed the basketball hoop according to the manufacturer’s instructions. I used anchor screws to secure the hoop to the platform to prevent it from moving.
- No sand or water in the base: Unlike a traditional basketball hoop base, I did not add sand or water to the base. This gives me the ability to move the hoop if I ever need to reposition it.
With these simple steps, I was able to create a sturdy and long-lasting platform for my basketball hoop. The 12 by 12 pavers provide a stable and level surface for the hoop, making it the perfect place for practicing your shots and playing games. Whether you’re an avid basketball player or just looking for a fun project to do with the family, this is a great option to consider. Maybe I have the courage to tackle a bigger paver project.
Amazon Links: The following links are affiliate links where I earn a small commission:Cork Screw Anchors: https://amzn.to/3GOzZy1
Driveway Net: https://amzn.to/3wcCXaL
Home Depot list:
12- 12×12 Paver Stones
3- Paver base Boards
3- Leveling Sand
Tools:
Digging Shovel
Transfer Shovel
Tamper
Level
Wheel Barrow
-
Journey to Scratch: Post #3
Tour of my bag!
If you have not already read the intro to this series then you will know that I am not just an enthusiast trying to take a deeper step in my game. I played college golf and was a low 80’s to high 70’s shooter. With that being said my bag might be further along than just some one playing golf for a few months. Nor do I just have a bunch of exposable income to buy the best things out there. I also have an attachment problem with a few items in my bag and wont be changing some of those things for a while. However since this will be a two year journey I will be very surprised if my bag is exactly the same as it is today.
I am going to share my set up, I won’t go in to crazy detail with shafts and grips but will let you know what I am playing with and how long I have had them. Every club is special to me so I remember the year I got them. Clearly a passion for golf right?
Woods:
Driver- (Nike Vapor) set at 9.5 degrees with a stiff shaft(Gifted in 2019)
7 Wood- (Taylor Made r7) Gifted in 2004 and got me through college.
Irons:
Mizuno MP5 forged Irons: Custom fit 4-PW.(Gifted in 2017)
Wedges:
Titilist “Oil Can” Wedges. 60, 56 and 52 degree wedges. (Purchased in 2008)
Putter:
Never Compromise mallet center shafted putter. (Gifted in 2001)
The Story of Each Club…
My driver still has pop and honestly until it breaks I have no attentions to replace that bad boy. I went to golf store 3 months ago to hit some new drivers. I hit the Taylormade Stealth 1, and Calloway Rouge ST. The reason why there are so many drivers to come out every year is for three reasons in my eyes. New tech, latest and greatest, and swing types. I have had some Taylormade woods in my days. I have always loved Taylormade, so I eyed the Stealth for a few months at this point and did not hit it very well. Took 10-15 shots and never really connected with one. The guy told me to try the Rouge because of my swing type. I played Calloway clubs in college and also a fan of their clubs. First shot I hit felt sweet and was getting ball speed in the 155 range which is not bad for a double digit handicap. Do I think simulators are tweaked for you to feel good to buy the club? Yes, however owning a launch monitor for about a two years at that point I knew it was pretty truthful. I hit it a few more time and knew that it was about the same thing that I have now and felt no need to switch. The pop on the new stuff does make the ball go a little further but I am not ready to dive in with a drive for $600 plus. My unbiased opinion is to wait a few years and get something gently used or try to find a model that is 1-3 years old new somewhere and grab that. If you have something older the chances it does not go as far because the new tech is pretty good. My pro tip would be to save up, and when ready go a few different days and if it is consistently over 15+ yards then go for it.
7 wood is a special club to for so many reasons. I started playing with a 7 wood from the very beginning. It has similar loft to a 2 hybrid or 3 iron. Some pros even carry a 7 wood in certain tournaments. It fits my swing and has alway been a fairway finder for me in the 230 range. With me mainly playing mountain course no longer than 7,000 yards I get by just fine.
Irons: My irons are very special to me. When I wanted to play more golf back in 2017 it was the only thing I asked for all year and my lovely wife delivered on my first father’s day. My Calloway cavity backs were good but I was ready to move back to a forged iron. I won’t get into types of irons here but I played forged for my senior season in college and was probably my best ball striking year. I was ready to get back to hitting the ball with full control. I will have these when my handicap is zero!
Wedges: They have been used hard for the years that I have had them. I play a 52 gap wedge, 56 sand wedge and 60 lob wedge. One summer in college I took my sand wedge to the driving range everyday to hit 100+ golf balls and did not miss very many greens that summer inside 100 yards. Last year I got a tool to re-grove the sand wedge from the pure volume of shots it has taken on. They do the job fine but I know having fresh wedges will be needed to dial back into true yardages with spin.
Putter; Without to0 much of story here, I was given this club by the man who taught me how to play golf. He was a scratch golfer and played with an identical putter. He was the best putter I have every played with on a regular basis. He gave me the same one he had because he could show me how his tricks. He also putted left handed which made it pretty easy to mimic his swing. Leading me to grasp the short grass the way he did.
Hope you enjoyed the tour and the inside look into my bag.
If you are reading this in hope to figure out what to do or buy as you take golf more serious my advice is to stay in budget for you clubs. These things can really get out of hand and not buying the newest thing on the market is the best. It is nice to have the newest toys but my 14 year old driver still can outdrive most people I play with, and keeps me in position pretty well.
-
Fixing My Child’s Ride-On Toy: A Circuit Board Swap
Introduction:
As a parent, there’s nothing more frustrating than seeing your child’s favorite toy break. This was the case with my child’s ride-on toy, which stopped working due to a faulty circuit board. I wasn’t about to let a simple problem ruin my child’s fun, so I decided to fix it myself by swapping out the old circuit board for a new one.
Part 1: Identifying the Problem
The first step in fixing the ride-on toy was to identify the problem. I tried a new battery and did not work. After troubleshooting the toy, I determined that the issue was with the circuit board. The board was damaged and no longer functioning properly, causing the toy to stop working.
Part 2: Finding a Replacement Circuit Board
Once I knew the problem, the next step was to find a replacement circuit board. I searched online and was able to find a compatible circuit board for the ride-on toy. I ordered it and waited for it to arrive.
Part 3: Installing the New Circuit Board
When the new circuit board arrived, I carefully followed the instructions to remove the old circuit board and install the new one. It was a simple process and only took a few minutes.
Part 4: Testing the Toy
After installing the new circuit board, I tested the toy to make sure it was working properly. To my delight, the toy was back to its old self and my child was able to enjoy it once again.
Conclusion:
Fixing a broken ride-on toy can be a simple and satisfying task for any parent. By identifying the problem, finding a replacement part, and installing it properly, you can save yourself a lot of money and frustration. Happy tinkering!
Bonus: I was able to get a conversion kit for my drill battery and it took the ride on toy from getting 12volt to 18volt. An easy 2-3mph faster, which became pretty fun to watch!
-
Journey to Scratch: Post #2
If you’re a golfer with a high handicap, one area of your game that you may want to focus on improving is your chipping. Chipping is the shot you use when you’re close to the green but not close enough to putt. It’s a shot that requires precision and control, and it can be a great way to lower your score if you can master it.
Here are some tips to help you improve your chipping:
- Practice with a variety of clubs. Chipping can be done with a variety of clubs, including your wedges, your irons, and even your putter. Practice with each club to see which one you’re most comfortable with.
- Focus on your grip. Your grip is important for all shots in golf, but it’s especially important for chipping. Make sure your grip is firm but relaxed, and that your hands are in the correct position on the club.
- Use a narrow stance. A narrow stance will help you maintain control and accuracy on your chip shots. Stand with your feet close together, and make sure your weight is evenly distributed between both feet.
- Hit down on the ball. When you chip, it’s important to hit down on the ball. This will help you control the trajectory and spin of the shot, and it will also help you get the ball up in the air more easily.
- Follow through on your swing. Just like with any other shot in golf, it’s important to follow through on your chipping swing. This will help you generate more power and control, and it will also help you make a cleaner contact with the ball.
In addition to these tips, it’s important to practice regularly in order to improve your chipping. Set aside time each week to practice, and focus on hitting chip shots from a variety of distances and lie angles. With enough practice, you’ll be able to chip with more precision and control, which will help you lower your handicap.
Title: Improving My Chipping Game: Tips and Insights
Introduction:
In my previous blog, I shared my journey to a lower handicap and discussed my weakest area: chipping. In this blog, I will focus on my journey to improve my chipping game and provide tips and insights on how I am working to improve this important aspect of my golf game. Whether you’re a golf beginner or a seasoned pro, I hope my journey will inspire and motivate you on your own journey to a lower handicap.
Part 1: Identifying the Causes of My Chipping Problems
The first step in improving my chipping game was to identify the causes of my problems. I used data from my golf tracking app and observations from my coach to determine that my main issues with chipping were a lack of control and consistency. I was struggling to get the ball close to the hole and I often hit the ball too hard or too soft.
Part 2: Focusing on the Fundamentals
Once I knew the causes of my chipping problems, the next step was to focus on the fundamentals. I worked on my grip, stance, and swing to improve my control and consistency. I also practiced drills that focused on accuracy and distance control. I spent time on the practice green and on the course, putting my new skills to the test.
Part 3: Implementing a Practice Routine
To continue improving my chipping game, I implemented a regular practice routine.
-
Winter Garden Experience
Winter gardening can be a rewarding experience for those looking to grow their own fresh produce even in the colder months. With the use of raised beds, it’s possible to create a microclimate that allows plants to thrive even in the depths of winter.
Recently, I decided to give winter gardening a try and set up a raised bed in my backyard. I used a seed pack to get started and was amazed at the variety of vegetables I was able to grow. My winter garden includes crops such as cauliflower, broccoli, radish, beet, carrot, arugula, green beans, peas, and kale.
One of the great things about winter gardening is the ability to go outside and grab the ingredients for that night’s meal. There’s nothing quite like the taste of freshly picked vegetables, and the added bonus of being able to grow them in your own backyard is a true joy.
So, how do you go about growing a winter garden in a raised bed? Here are some tips to get you started:
- Choose the right location: Raised beds can be placed anywhere in your yard that receives at least 6 hours of sunlight per day. Make sure the bed is level and has good drainage to prevent water from pooling around the roots of your plants.
- Select the right seeds: Look for seeds that are specifically suited for winter gardening, such as cold-tolerant varieties of your favorite crops. Consider the length of time it will take for the plants to mature and choose seeds accordingly.
- Prepare the soil: Fill your raised bed with a rich, well-draining soil mixture and amend it with compost or other organic matter to provide the necessary nutrients for your plants.
- Cover the bed: Covering your raised bed with a clear plastic cover or low-tunnel hoop house can help to create a microclimate that will protect your plants from the elements and extend your growing season.
- Water and fertilize regularly: Be sure to water your plants regularly and fertilize them with a balanced fertilizer to keep them growing strong throughout the winter.
With a little bit of effort and care, you can enjoy a bountiful winter garden in your own backyard. There’s nothing like the satisfaction of growing your own fresh produce, and with a raised bed, you’ll be able to enjoy fresh vegetables all winter long.
-
Golf Journey to Scratch:Intro

Introduction:
As a golfer, there’s nothing more satisfying than lowering your handicap and achieving your goals on the course. My current handicap is 11, and I am determined to improve my game and reach my goal of a single-digit handicap. In this blog, I will share my journey and provide tips and insights on how I am working to improve my game and lower my handicap. Whether you’re a golf beginner or a seasoned pro, I hope my journey will inspire and motivate you on your own journey to a lower handicap.
Quick background on my game to give context:
I grew up in a golf town in a golf family, meaning I was able to start golfing at the young age of 11 when I was ready to start. Long story short is I played a lot of sports growing up and never gave golf my all. However I did play competitive golf from 13-15 years old. We played 9 holes and I would usually shot 3-6 over. I did not have an official handicap then but was able to get around the course pretty well. I then worked at golf course from age 15 until I was 21 in college.
In the midst of my college days I did play on the golf team where I would shoot low 80’s on a normal days. In high pressure tournaments I would score in the 90’s to 80’s with 84 being my best round in a tournament. I would have a few blow up holes here and there leading me to shoot over 100 in a few tournaments as well. Stick around to hear how I had 16 in a tournament on a par 5 draining a 45 footer for 11 over on one hole! In college I played a few round where I would shot under par on the front and a few over on the back or vise versa. Best round to date is 75. Once College was over I stopped playing as free golf was officially over. I would play on and off for the next 10 years and would shoot low 80’s to mid 90’s. Some years I would only play 1-2 a year.

Picture above is from 2011. I was a senior in College watching The Masters.
The real way I got back into the game I love is through introducing my son to the game at the ripe age of 1 years old. Yes I am that guy, I love golf and have not had the time, close to a course or money to play consistently. Life is a bit different now with a course 5 minutes away. I am ready to find my best game ever.
Summer of 2022, I got a range membership at a local club and started playing 1-2 times a month. My game was not tight in the areas I used to excel in. Never been great off the tee but my iron game and putting was plus 4 to 5 shots gained in each area. This swing I have now, a bit older and heavier my contact with the ball feels very different. Worst round since consisten rounds starting in July 2022 is 96 with best being 82. I am a former collegiate golf, and play by the rules even when I am having fun. In the short of it all I am on the journey now to officially become a scratch golfer.
There is the background, follow along on social as I will be posting video evidence of the journey. With the goal to be scratch by the end of 2024.
-
Spinn Coffee VS Nespresso Vertuo

The quest for a new coffee machine
If you’re looking to get away from using coffee pods and move towards using fresh coffee grounds, you’re in good company. Many coffee aficionados believe that using fresh grounds provides a superior taste and greater control over the brewing process. But finding the right coffee machine can be a challenge.
Recently, I had the opportunity to try the Spinn coffee machine, but it didn’t quite live up to my expectations. I was left disappointed and still in search of the perfect coffee machine.
So, what should you look for in a coffee machine that uses fresh coffee grounds? Here are some factors to consider:
- Ease of use: Look for a machine that’s simple to operate and easy to clean. The last thing you want is a complex machine that takes hours to clean and maintain.
- Grinding capability: Some coffee machines come with a built-in grinder, while others require you to grind your own beans. If you’re looking for convenience, a machine with a built-in grinder might be the way to go.
- Brew strength control: The ability to control the strength of your coffee is a key factor to consider. Some machines come with pre-programmed settings, while others offer the ability to manually adjust the strength to your liking.
- Size and design: If you have limited counter space, you’ll want to look for a compact machine that won’t take up too much room. Additionally, consider the design of the machine and make sure it fits in with your kitchen’s aesthetic.
- Price: Coffee machines can range from relatively inexpensive to very expensive. Determine your budget and look for a machine that fits within your price range and offers the features you need.
These are just a few of the many factors to consider when searching for a coffee machine that uses fresh coffee grounds. With so many options available, it can be overwhelming to find the right one. But with a bit of research and a clear understanding of what you’re looking for, you should be able to find the perfect coffee machine for your needs.
After further research I am leaning towards getting a Terra Kafffe. The downside at this point that machine does not come until the fall of 2023. I’ll check back when I have the new machine. Until then I am just going to stick to the Nespresso.
-
You Can Make Sushi

Sushi has been a long beloved treat for me, streching about 18 years back when I would go and get all you can eat hibachi / Sushi at a local place where I grew up. That was my introduction as a teenager and was not sure what was good or what was bad. Long story short, I love sushi and have learned what is good and what is not.
If you know me or have been following along with me for awhile you know I love to try new things. Finally when I had capacity I was ready to try my hand at making homemade sushi. As I do for most things before I buy, I started researching what to buy and what I needed to actually make sushi at home. I learned I needed a handful of ingredients and some type sushi rolling mat. Upon further study I found a tool to help make this whole sushi rolling thing a bit easier, called a Sushi Bazooka. I purchased a this Sushi Kit and really enjoy it. I walk you through the whole process of what I did to make sushi in the video here.
At this point I have been making sushi at home occasionally for the last 2 years. The kit makes a big difference as it has different tools to make the roll. I think you could get bit just buying a roll and depending what type of sushi:
The two main types I make at home are Uramaki and Maki. The sushi kit I use has the ability to make 5 types of sushi. Although Sashimi is technically fish with dressing. My one pro tip for making uramaki is use plastic wrap over the bamboo wrap.
To make things simple I typically just use the bazooka to make my Maki and it is fantastic. Now let’s talk about fish. You need sushi grade fish, in urban areas at a farmers market it typically is pretty easy to find this type of fish. The fish I have used was fresh from a local fish market that give me thumbs up for sushi. They called it sushi grade but do your research to know what is safe to eat raw. I no longer live in that urban area, and have just resorted to using imitation crab like I used in the video. Most grocery stores carry some type of imitation crab or even smoked salmon. Tuna and Salmon were two easier to find and more safe than most, from what I have learned. You are able to order Sushi grade fish online but I have never tried it because it is so expensive.
Recipe:
2 Cup of Sushi Rice (short grain)
2 cups of Water
1/3 Cup of Rice Vinegar
1/3 Cup of Sugar
1 pack of Imitation Crab
1 Avocado
1 Cucumber
1 pack of Seaweed paper
I use an instant pot to make my rice. I use 2 cups or short grain rice with 2 cups of water and set it to steam for 5 minutes then let it release naturally. Usually let the pot release for 15 or more minutes. Once it is ready I put a mix of ⅓ cup of rice vinegar, ⅓ cup of sugar to rice and stir. Let the rice sit for another 15 minutes or so and its ready for sushi.
This is what I know and pro-tips. Feel free to connect on social or here if you have any questions.
Happy Sushi Making Friends!
What I used in this video: The following links are an affiliate link where I earn a small commission:
Sushi Kit: https://amzn.to/3VDSlHn
Instant Pot: https://amzn.to/3Qk0EHy
Strainer: https://amzn.to/3VLcjjD
Bowls:https://amzn.to/3jQsJdm
-
How to make Every PSI Count with an Eletric Power Washer

When it comes to power washers and being able to find the right one for your project, it comes down to price and power. The price difference from what you can get from top end with 4200 psi at $1500 plus or to bottom end with 130 PSI at $50, is pretty drastic. I was looked to find a power washer, which turned into a three years journey, I was looking for something strong enough to wash my driveway, house, fence, car or other household things. I power wash my driveway once a year and have borrowed a few for friends over the years but it was finally time to get my own.
I was willing to spend up to $100 dollars for a power washer, which mean getting something new in that range was going to be not realistic. Looking at something electric was going to have to be my ticket. The idea of an electric power washer didn’t seem strong enough and after borrowing a super nice Generac pressure washer one from a friend’s that was in the 4200 psi range. I realized that a power washer needs to be strong but not super strong. I was pulling paint off my house by accident with it. I then borrowed a Ryobi electric power washer from a friend that was electric and 1800 psi. I figured I needed something a little stronger, with the small electric one, it was hard to do certain parts of my driveway.
Once I was able to find a power washer and in a good price range I pulled the trigger on one that was 2030 psi. This gave me the ability to wash my driveway but not poke a hole in my fence with all the extra power. I went with a Sun Joe pressure washer, as I have a Sun Joe Pole Saw I love and thought for the price it could not be beat. I will tell you I got it for $60 on a prime day sale which gave me the ability to buy a surface cleaner as well. I got one from Ryobi Surface Cleaner home depot which was $2 over my overall budget of $100.
Here is the video of me walking through power washing my driveway with a little but strong enough electric power washer by Sun Joe.
Video here:
The thing that makes this electric power washer possible to clean a dirty driveway comes from soaking it with pre-wash. I used the pre-wash setting to cover and soak my driveway with ZAP Concrete pre-wash. I am also able to store this power washer on a small wire shelf in my garage.
All in all if you are looking to see if you can power wash a driveway with an electric power washer, the answer is YES! Anything under 2000 psi might be a struggle but it is possible. Bonus tip would be if you are power washing driveway use a surface cleaner. I have used this Ryobi Surface cleaner and this other Electric surface cleaner on casters. The one with Caster wheels seems to be the better product.
That is it for now! Happy power washing!
All links in the blog and below are affiliate links where I earn a small commission: I have linked them with pictures below.
Click to Shop Below
-
How to use the Spinn Coffee App
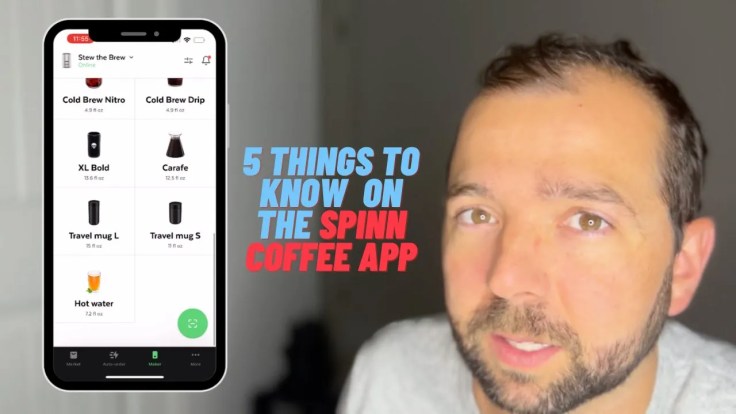
If you are reading this, you are probably interested in the Spinn Coffee Machine. I have been a dedicated user of this Nespresso Machine for the last 3 years. If you are doing initial research on the Spinn Coffee Machine here is what I wish I knew… How do I use the Spinn Coffee App?
When I went to learn about the Spinn App I did not find much out there. I downloaded the app and could not get any functions to test it out. They need a test function in my option. The page on their website it pretty minimal and does not necessarily share how to use. I made a video to share how to use the Spinn and 5 things I wish I knew before I got the Spinn machine:
My main reason to move away from my beloved Nespresso machine was to be able to buy beans vs using pods. This will be a small tangent… Nespresso is Delicious, however all other coffee is just okay. That is not a big problem at home, but when I travel or go on a coffee date with my wife I don’t enjoy my $6 to $8 Oat Milk Latte. I don’t think Nespresso pull a true shot of espresso. I have done some research and one of my favorite youtube channels Seattle Coffee Gear talk a lot about pure espresso and Nespresso is not their first choice. As a retailer of coffee gear I think they are pretty credible to know what is its truest form. Tangent is almost over… If Nespresso was a real espresso shot then why doesn’t every coffee shop move towards using their machines? All that to say is I want to enjoy all coffee not just my coffee at home.
Moving away from Nespresso means I need to find a new machine. Being a busy husband, dad of two kids, with a full time job, blog, youtube channel, and pursuing other dreams I have decided I wanted to get a bean to cup type of machine. Preferably a super automatic machine where I can get pull a latte in just a few minutes with not much work. The Spinn Machine is not quite a super automatic machine but was sold on the idea of getting it when I saw Seattle Coffee compare it to a Miele Machine just over $2,000. The idea of a Spinn just under $1,000 sounded good to me.
I did purchase the Spinn and verdict is… I will let you know in a few weeks after I really know what I think!
**Any Amazon links are affiliate links where I earn a small commission on the items I linked. I have linked them again here:
Spinn Coffee Machine: https://amzn.to/3Cl53Uy
Nespresso Machine: https://amzn.to/3Z7KIfq

-
Subscribe
Subscribed
Already have a WordPress.com account? Log in now.
